Monday, 21 May 2012

Building from the ground up

So after some additional exploratory demolition this week, we've come to accept some realities:

1) There are no footings for our foundations (they are poured on grade).
2) We need footings (given our soil and moisture issues).
3) Given the weight of the soil (HEAVY), we need to have a mini-digger in to excavate.

So - this past week was "break up the foundations with a jackhammer and get ready for the mini-digger" week, as well as cut away the lower wall sections (which I'm aiming to convert into furniture...ambitious, but we'll see).

Given the fact that our house sits on a clay lens which means that when it rains, we get a puddle of water below our house about 6-8 inches deep, I'm feeling like "damproofing" the footings simply isn't sufficient. Concrete wicks moisture and so if you're footings are sitting in standing water, welcome to wet walls. Accordingly, I'm going to opt to go with an interesting new "technology" (hard to call a bag "technology") in which your footings are poured into a waterproof bag. The company is called Fab-Form and they offer not only these "footing in a bag" (called Fastfoot), but also Insulated Concrete Forms (ICFs), which are styrofoam blocks that allow you to form and pour concrete that is automatically insulated. We're still finalizing exactly who we'll use, but the plan is to create a foundation with roughly R30 footings.

I spent the weekend moving concrete around (which I'm aiming to reuse in the garden for retaining walls), as well as organizing wood, and getting set for the digging machine to come in. Here are some pics of the place as it stands:

Concrete, wood, gravel....oh my! Now organized far better than this. 
Our elevated house, now with a fancy blue fence!

Foundation, in block form, ready for life as a garden wall

The side of our house, foundations broken.

View to the front of the house with cribbing partially filled with gravel for mini-digger to get through

Kristina at the rear of the house - May 17, 2012


On Saturday, we also hung out on our block and solid a whole $13 dollars worth of "stuff" that we were aiming to get rid of (as well as spent $0.50!), but did get a chance to meet more of our neighbours which was great. We continue to be happily surprised at the new community we'll be joining come fall.

Hopefully by the end of this week we'll have our foundations dug, and the foundation ready to pour for the following week *fingers crossed*.


Saturday, 12 May 2012

Countdown and.....lift-off!

VANCOUVER, BC (AP) - On Wednesday, just after 1:00pm, it happened: the crap shack took flight. After weeks of preparation, it finally happened. So I'll go back a few days to take you through the journey of the last little while...

I believe last time we left our heroes, they were facing a place that looked something like this. Filled with layers of stuff, asbestos, non-containing vermiculite (more on that), etc.and still needing a LOT of work, I continued to work evenings and weekends to transform the place from this:


To this...


To this...


However, in the process, (shock of all shocks), I found, you guessed it...MORE hazmat stuff...So, called up fleck and they came back to remove more vermiculite, more insulation, and even more asbestos-containing flooring that hadn't been picked up. It was mainly just sloppy work - they hadn't diligently gone through the house. So, they came back through and throughly vacuumed and got rid of "most" of it. I still had the vermiculite raining down upon me even after that (while removing some of cedar shakes that connected into the attic - yes, was wearing an approved respirator and other equipment), and on top of that, they had damaged the floor joists, broke a window, damaged piping...and on lift day, we found....MORE asbestos containing tape (on duct work)...so...they came back AGAIN...


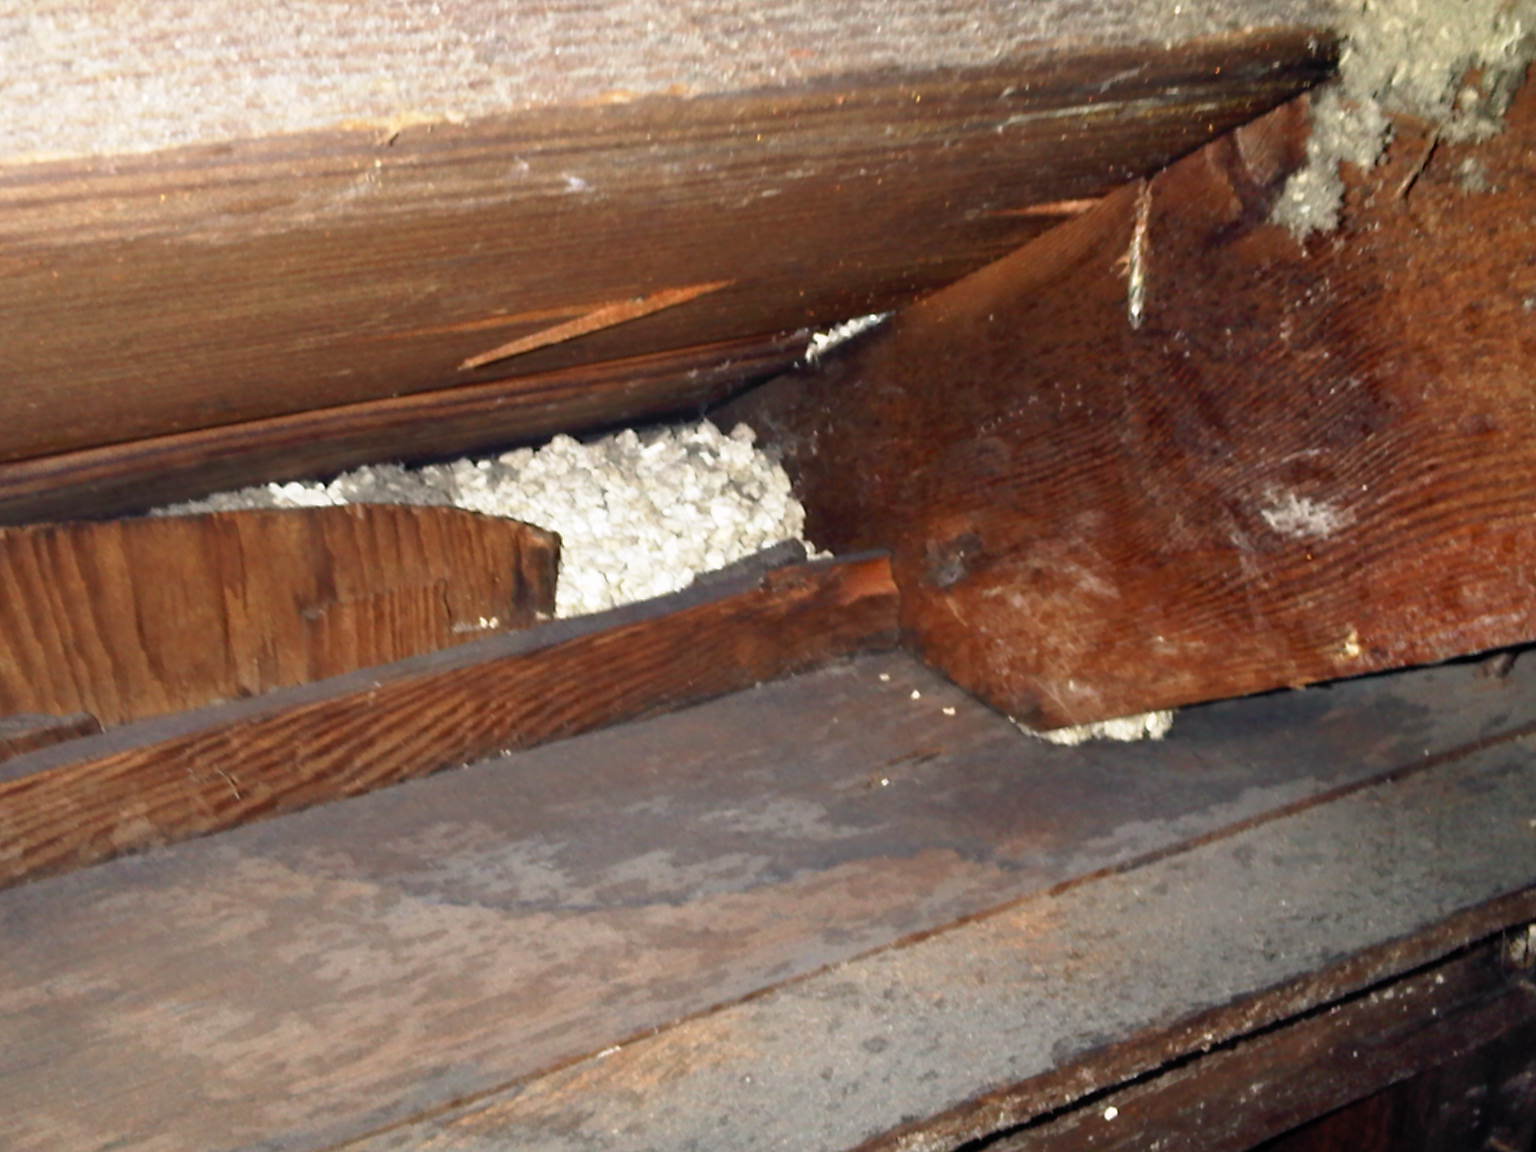
The state of the cleanup, "post" cleanup... You can
see the vermiculite mixed into the grey insulation
A nice cut through our sub-floor (which extended into the joists)

I also spoke with Worksafe BC and after a lot of beauracratic bafflegag, the official line I got was this: unless you've sampled every speck of vemiculite (which would cost more to sample than to remove), Worksafe treats it as asbestos (to cover their arses). So, lesson is: vermiculite = asbestos (even if it it is the equivalent of potting soil). Awesome.

With the hazmat chapter NEARLY done (we still need to sort out payment and get our hazmat clearance certificate), I moved on to nail removal. A LOT of nail removal...my my rough estimation about 20,000 nails (a little over 1200 sq.ft. of wall, with on average about 16 nails per square foot). Probably the most challenging aspect of this was establishing and taking down the 21' high scaffolding by myself. The good news? (A) It's done, and (B) it trimmed 13 lbs off of me in the process with no injuries in the process aside from the odd nail poke and scratch (and a lot of sore muscles).


That left us with the this one the interior:

The other big job was getting four 5'x5' holes dug in the slab (the big block of concrete that is the "basement floor"), which differs from the foundation (which are basically the "concrete walls" that the weight of the house rests upon). James (one of the general trades people working on the site who will be assisting throughout) cut a line into the slab using a jackhammer, but we quickly realized that the slab was only about 1.5" thick, meaning that a 17 lb. sledge hammer did the job with no problem. Once we were through the slab, the digging began...and kept going...through a 3" organic layer, and then about 36" of thick clayish loam, before we hit water, and finally a clay lens (hard pan). If it's not already obvious, it was HEAVY work with VERY sticky soils that made for slow work. Furthermore, we found out that with 6-12" of standing water in the holes, we needed to add gravel, so that then got sorted. But, after several days of slogging soil and moving gravel, we were set with four holes, approved by Henry Hsu (our structural engineer from Formosa Engineering - who has been wonderful).

My what a lovely hole in the floor!
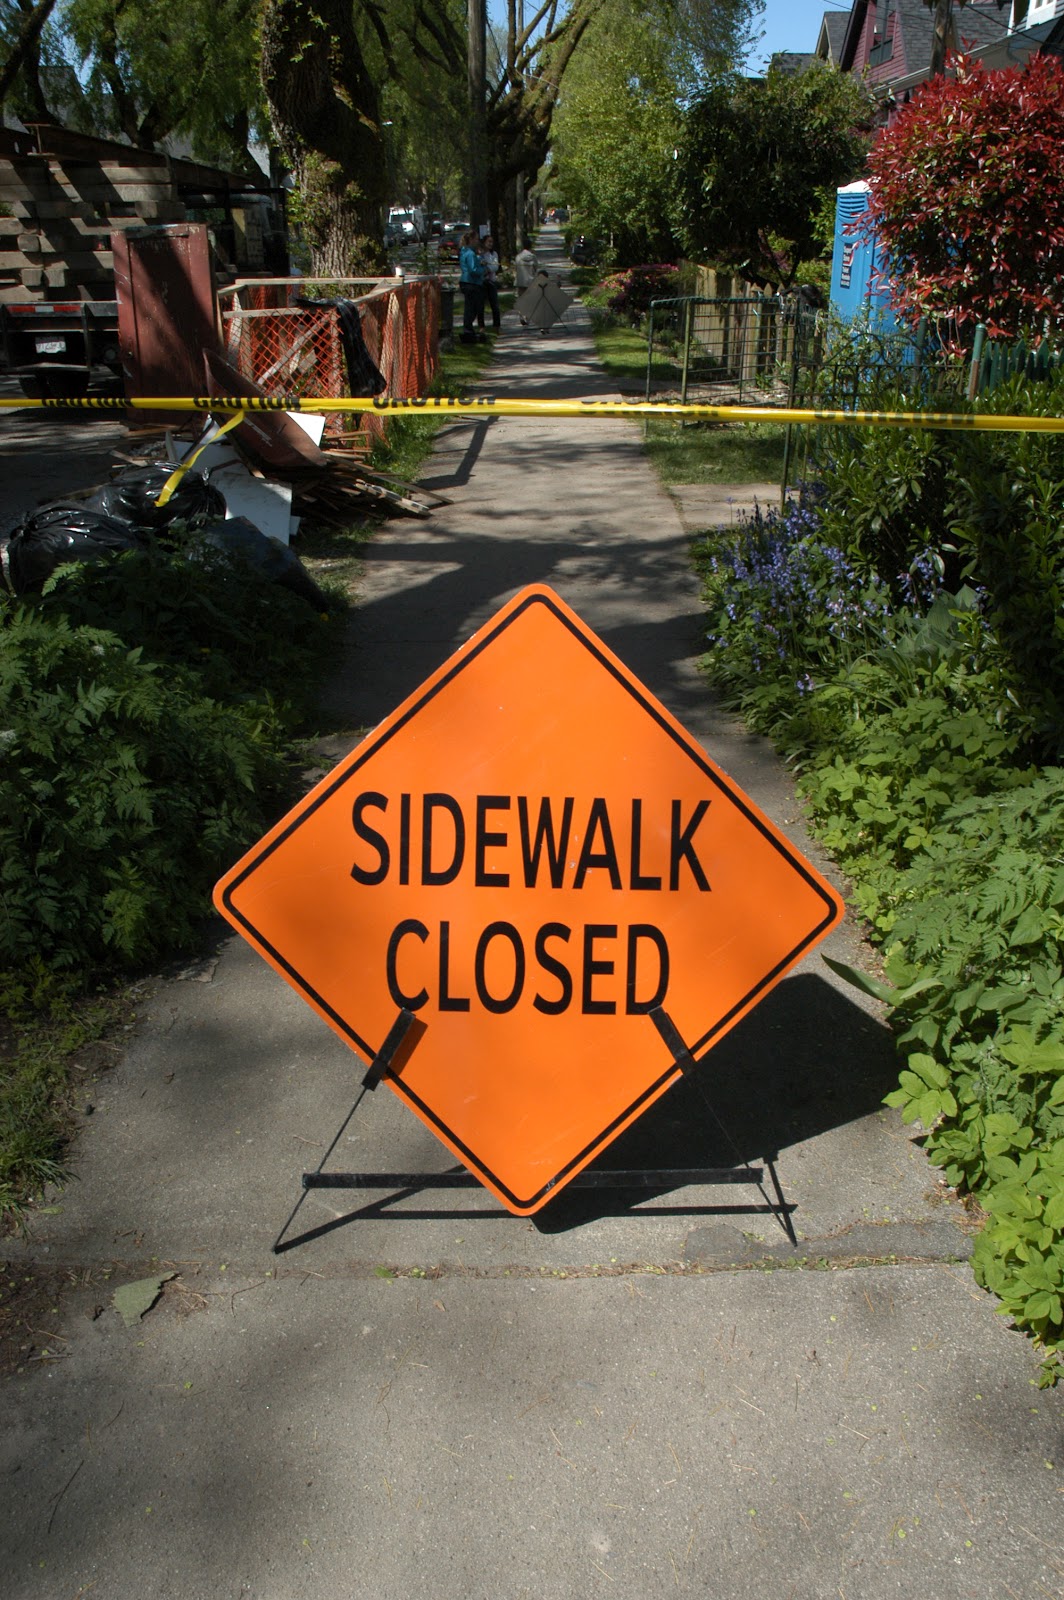
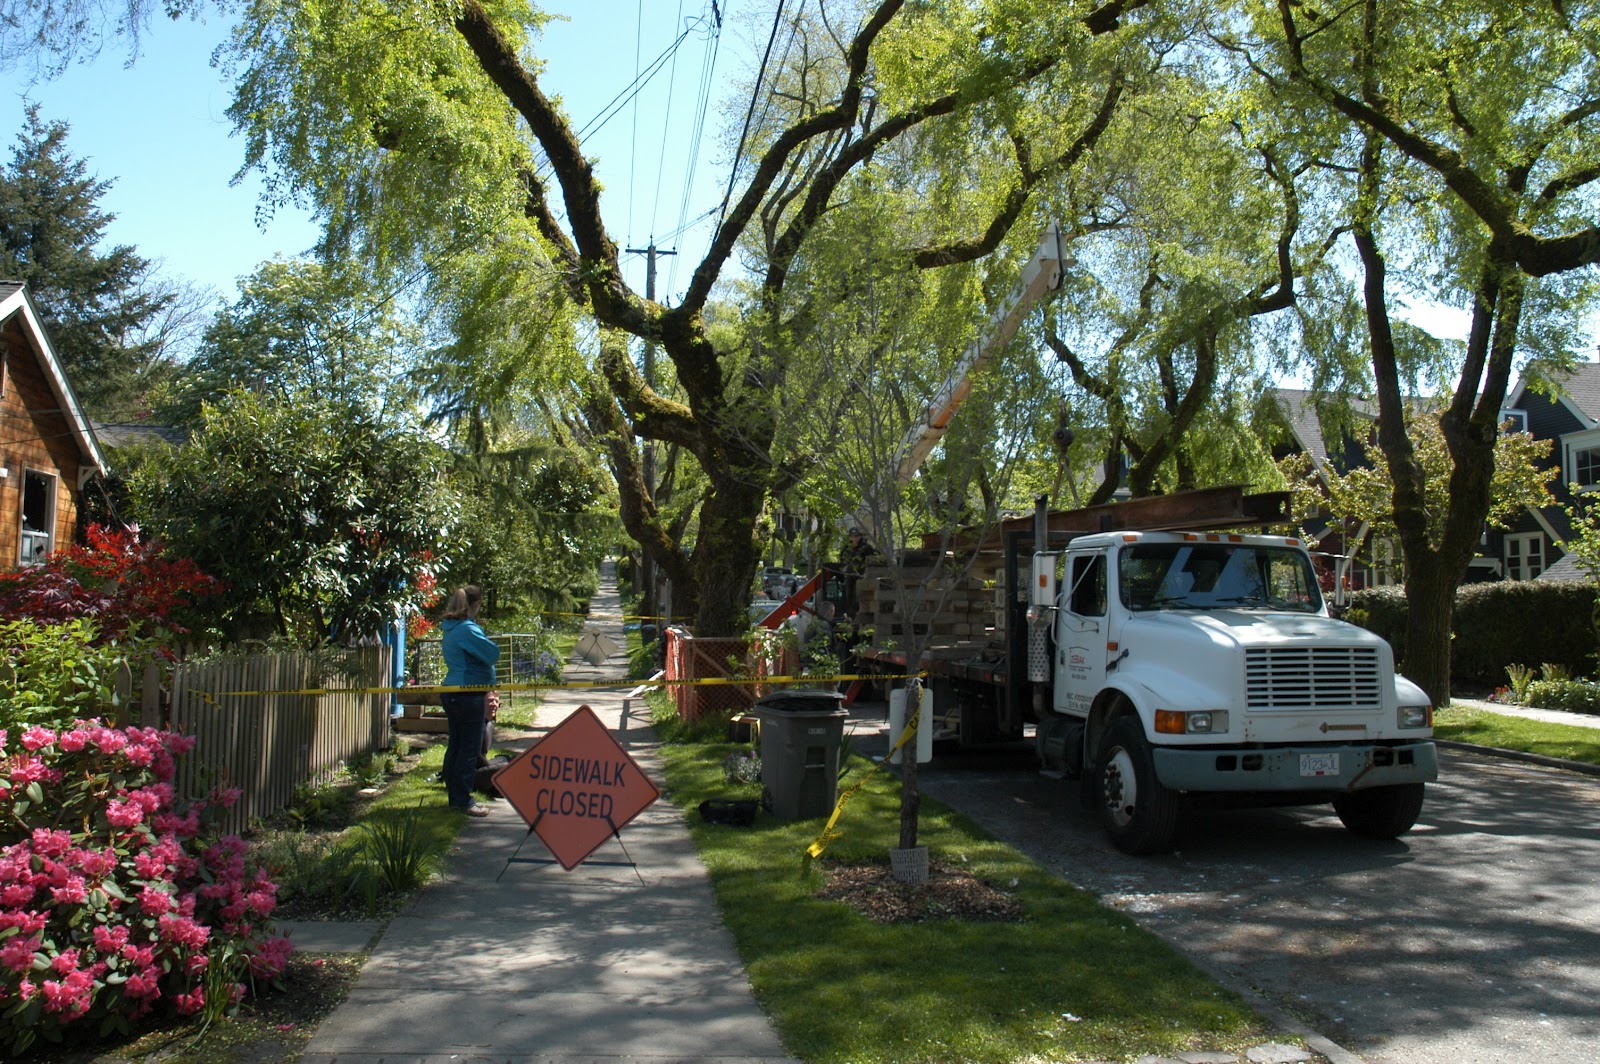
With things set to go, on Wednesday, May 9th, we obtained a permit from City Hall (they love their permits!) to block off half of the street, and brough in Zebiak for the lift. I arrived on site at 7:30am and met up with James and Mark (our site superintendent). We worked to finish up the lift prep (get the gravel level, pump out water that had built up in the holes), remove some boards, garbage, etc. etc. and we were set.


The crew of four guys from Zebiak arrived at around 8:30 and started setting up the "cribbing" (basically - jenga for houses). Each block is about 8" x 8" x 4' and weighs about 50 lbs. These are stacked up to near the ceiling and that took about 3 hours to get set. After that, they brought along a crane and unloaded the 30' steel beams (one of the two small hiccups of the day was that the house is 32' long - they "extend" the steel beams using cribbing...the other hiccup being the fact that we had originally said "about 4 feet" for the raise, not 4'9" which was the actual height...which we managed to sort in the end with an extra hour's work).

Here you can see the crane unloading the first of the beams
The beam ever-so-carefully being manoevred past the "prized" oak trees
on our street (seriously, the crane operator was an artist)
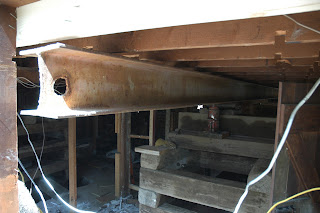
Here you can see the cribbing, a jack, the beam, and how it fits in with the existing ceiling joists.

With all of the pieces in place, around 13:00 Pacific Daylight Time, we had lift off! I barely even noticed it at first because they only took it up an inch or so, but eventually, they got things moving...and once the lift was underway it was pretty fast. They go up about 14" in a single "lift" which takes about 90 seconds, and then the add additional cribbing before resetting and repeating the process. Ultimately they did about 5 lifts and here was the result:


In the end, this was the change...


Pre-lift
Mid-lift

Post-lift

 I've got some video as well that I'll add soon, but for now I'll leave you with this as a parting shot - it gives you a good sense of how much the house is now UP in the air. 


Monday, 30 April 2012

Ever thought a lot about your plumbing?

And no, I don't mean your personal plumbing, I mean the pipes that carry the water in and out of your house.

The past few weeks have had me thinking a fair bit about plumbing (amongst many other things). From the time when I heard that the City of Vancouver was giving us the opportunity to upgrade our own sewer and water pipelines to the tune of $13,000, to the decisions about PEX vs. copper vs. ? and ABS vs. PVC vs. Cast iron, etc., there are a lot of things to consider when it comes to simple "pipes". So what have I learned from all of that? Well a  few things:

1) PEX, for those of you who don't know, is "cross linked" (thus the "X") high density polyethylene (HDPE, thus the "PE") or for those of us in the realm of "simple knowledge", a #2 on your recyclables. It is food grade and generally considered safe, but there seems to be some level of discomfort in the literature out there as to whether or not it is carcinogenic or not. California had a long, disputed battle between different parties on the PEX front as PEX was not allowed in the State's plumbing until 2009. While the conclusion of the debate was that it posed no significant health risks, there is still some debate on the topic and the long-term health effects of PEX piping are still somewhat unknown: http://www.builderonline.com/legislation/californias-pex-battle-continues.aspx While it's more than likely safe, and has been used in Europe for decades, there are many confounding factors, such as whether it is exposed to UV (which degrades the plastic...which makes you wonder about #2 bottles kept out in sunlight!?) or whether the plastic is exposed to chlorine (which most water supplies are).  PEX also emits VOCs and can add strange taste to water (apparently). On the plus side, it's easy to install, and generally has lowered embodied energy and can even be colour coded. And I've been drinking from it for the past 4 years (maybe longer?). So...hard to say...but what are the alternatives?

A picture of PEX tubing (blue for cold water, red for hot water!)


Well - the "tried and tested" answer is copper. Naturally antibacterial, copper has been used in houses for a long time and seems to be safe when used with non-leaded solders (plus can be recycled). However, copper does have significant impacts in terms of its mining (albeit so too does oil!), is more expensive, and copper toxicity can exist.

Option #3 is to use polypropelene (PP, or a #5 on your recyclables). PP is more temperature resistant than PEX, can be recycled and altogether seems like a safer plastic. It has a fair bit going for it and is a contender at this point, though one must it into context in a world FILLED with plastics (and who knows what is in other parts of the water system, right?).

Green Building Advisor - perhaps the best resource I've found in my house journey thus far - has some good discussions on this, but the conclusion is definitively inconclusive!
http://www.greenbuildingadvisor.com/blogs/dept/qa-spotlight/how-safe-pex-tubing
http://www.greenbuildingadvisor.com/community/forum/green-products-and-materials/18789/pex-tubing


All said and done...I think I'm going to install a carbon block water filter in our kitchen which should help to cut out all of the nasties in whatever water we have. Something like this.

PVC is another material (#3 on your recyclables) which is generally nasty stuff (to manufacture, it offgases VOCs, etc.) I've made the decision to try to cut it out of the house wherever possible. It's one of the "banned" substances in the Living Building Challenge, and those behind the LBC tend to be out ahead of the curve and I trust them to be on things like this. It's nasty to produce, it offgases a lot (which affects indoor air quality) and just is a product that should be eliminated from human use in my opinion. So, we're trying to get rid of it...and instead using....another plastic! ABS, or Acrylonitrile butadiene styrene or (C8H8)x· (C4H6)y·(C3H3N)z) is another thermoplastic...pretty benign except (like the rest of them) when burned. 


Oh - and apparently cast iron is way quieter for flushing toilets (albeit more expensive).


Lastly - have found this gal on the North Shore who was recommended to me by the mechanical company that we're likely to go with (Westwood Mechanical).


Other plumbing related notes: will likely do a Navien CH-240 Combi boiler (which in english means that I will be using a combined "boiler/hot water tank" system that provides the house's hot water for domestic use as well as in-floor radiant systems, all in a nice little box (no separate hot water tank, no boiler). It's space efficient, energy efficient, and if you're so inclined, allows you to have unlimited hot water showers (very non-green of me to say). We considered a Viessmann Vitoden 100 system (German) with an on-demand hot water attachment, but it's an extra $3000 and bang-for-your-buck, you're better off with the Navien (Korean...hey, their cars are beating out BMWs and VWs these days as well!). We're also looking into using radiant hydronic baseboard heat for the upper level of the house which actually is hidden in standard baseboards (no ugly radiators, plus its radiant versus convective heat). I also considered an air-to-liquid heat pump, but opted against it in the end...think I might have mentioned this before....since my mind is fading, I better call it quits for tonight.

Lost Creeks (hopefully NIMBY!)

With some pretty wet soils, I've started to do some digging about buried streams in Vancouver. While I'm all for daylighting buried streams (and in fact might look into it more in the coming years here in Vancouver), I have heard rumours that in fact there's one in our neighbour's back yard.

Did some quick research and came up with the following from the City of Vancouver:
http://vancouver.ca/commsvcs/cityplans/stillcreek/lostcreeks.htm

lost streams

While it's hard to tell if it runs through our backyard from this one, I think I'll do a bit more digging and see what I can find out...will keep people posted.

Sunday, 29 April 2012

Demo nearly done...getting set for lift off

So - a bunch of updates on various fronts as we move along.

1) Demolition & Hazmat: 
The demolition is nearly complete. I spent all day yesterday over there and will go over again today to remove the final bits of debris. We've been using a social enterprise called Embers, who trains workers. While the company has been good, the scheduling of workers has been challenging because sometimes people don't show up, need to leave early, etc. They've generally been solid workers, though it's always difficult to know exactly how efficient without sitting there and overseeing them 24/7. Based on my own work-rates, I'm guessing I could work faster than they have been, but they did get a lot done, so I'm largely content with them despite a few hiccups.

Conversely, we've had a lot of issues from our hazmat removal company (Fleck Contracting). They originally quoted the work as $1900 for removal of asbestos-containing flooring, ducting tape and breeching cement + $5000 for the non-containing vermiculite. That then become + $1800 when we apparently "contaminated the whole house" (some of the grey, loose-fill insulation had fallen out from the ceiling - note that this was not the vermiculite).  After they "finished", there was still tons of the grey, loose-fill insulation kicking around, AND I'm still finding vermiculite as well. On top of that, I've even found pieces of the asbestos-containing flooring to boot. While to their credit they came back and did "additional cleanup" including removing some additional tiling that we uncovered, there is still stuff left over after a repeat trip back here. So, needless to say, we haven't been impressed and there is more of a fight on this front to come.

Left-over loose fill grey insulation in the wall cavities (Taken Apr 27, 2012)
Left over mixed grey loose-fill, and golden vermiculite insulation (taken April 27, 2012)
Left over vermiculite insulation in ceiling (taken April 27, 2012)
2) Garbage: I massively underestimated the amount of garbage that would come out of the house. Originally I had thought it would be about 3-4 trailers worth (= ~20 m3). Instead, I've produced about double that, so in retrospect, I should have ordered a 30 m3 bin at the start and just been done with it all that way. It probably would have saved me a lot of hassle and a few hundred dollars. The double layer of siding, and all of the lath and plaster, plus multiple layers of carpets, etc. etc. has meant a fair bit of junk. I've done my best to deconstruct, but so much is just useless and has to go to landfill. On top of that, I've been battling street parking issues because we have no rear lane-way, which means I've been having to ensure that cars don't block access for picking up and dropping off the trailers. However, I think I'm nearly done with garbage removal at this point and will probably create a bit of a junk pile from here.

We started with the little yellow trailer....
...and quickly managed to fill this entire bin.
3) Sheathing: We've found out that the existing sheathing can at least be reused from the upper level. It is shiplapped fir and in good condition. The structural engineer has given us the green light to use the upper layer if re-nailed. The lower layer will be reclaimed and I'm debating about how to use it (shed? interior somewhere? something else?). The bummer is that I have to go back and remove about 10,000 nails that were attaching the cedar shingles...ugh...

4) Slab and foundation: On Friday, we finally started into "lift prep" and brought in the jackhammer to have at the slab. I'm not sure what to make of the news yet...the slab is thing - probably about 1.5-2" in thickness and can be broken with a sledgehammer, let alone a jackhammer. So it's easily removed which is probably a good thing...BUT...having gone through the slab and into the soils under neath, we've found out that the soil profile may be a problem. It's about 2.5' of rich, organic and MOIST soil, followed by a clay lens. When those things are added together, and you locate someone at the bottom of a hill...you get....water. Yep, we've got about 6" of standing water that's sitting on the clay lens, so I'm not sure at this point what's going to happen with that. We're bringing in the structural engineer early next week to advise on that, but it might require some modifications. The good news is that we're not on a peat bog, but the bad news is that we might have to do some additional things to the foundation and slab to ensure that water doesn't come up through the ground floor. More on that this week - which in turn will determine when the lift happens (hopefully end of this week).

5) Electrical and mechanical plans: We've updated the mechanical and electrical plans now. I think we're finally settled upon the two companies we'll use: for electrical, it's a connection of Brett's - Fitterer Electric, while for all other mechanical (plumbing, HVAC, sprinklers, etc.) we're going to use Westwood Mechanical (who are a green mechanical company).

For the electrical, we're going to do mostly pot lights, and have them be LED ready for the future. Most of the rest of the electrical is pretty standard with very few bells and whistles.

The mechanical system is more interesting and I think we finally settled upon a combi condensing gas boiler system which will deliver the heat to our hydronic radiant floor system, as well as on-demand domestic hot water. It's small, efficient, and while keeps us on natural gas (i.e., fossil fuels), it is a relatively elegant solution for a small space (especially because BC Hydro punishes you for going electric vs. gas). We're still debating between a Navien and Viessmann system, but aside from that, I think we're going to go with that. We also considered an air-to-liquid heat pump, but at an extra $14K, we couldn't justify the added expense. Perhaps we'll consider it at a later point when our combi system calls it quits.

I've got to get over to the place, so I'll quit there, but here are a few other shots of the place:

East wall - building paper, scafolding, and some smurf cedar shingles

Front of house with some stucco/shingles remaining

Reard of house with the various layers showing

One JUMBO sized abandoned wasps nest that was in the front porch

The basement (to be main floor) as of April 25, 2012

Rear of house with all shingles/siding removed.

Front of house with all siding removed

East wall with fir shiplap sheathing exposed

Sunday, 22 April 2012

Updates from the demo-zone


Our little "craptastic" house - pre-demolition 

Some updates from the front line of the demolition zone: so after doing some reconaissance demo and getting the power pole up last week, we started into serious demolition this week and I had two guys from Embers come in to help out with the demolition. They started on the inside (and made good progress), but unfortunately, due to mis-communication, managed to punch through into the ceiling and expose the vermiculite to the main floor. That meant that when the contractors came to remove the vermiculite, they freaked out and wanted an additional $2K to contain the lower floor - more on this in another post.

Wow, what a nice power pole...note - trailers don't belong in (or fit well into) small front yards.
After a chaotic Tuesday, and a bunch of difficulty procuring scaffolding, things finally got underway on the outside (cladding removal) AND inside (hazmat).

The hazmat's supposed to be done tomorrow, while the "clean" demolition (all demolition is dirty and nasty) will continue until at least Wednesday I'm guessing.

So what are my thoughts on demolition thus far:
- we're down 2 walls, and have 2 walls left...and it is HARD work. I'm really sore and tired. I'm not sure if it's because there are two layers (stucco and cedar siding), or whether it's because there are about 10 zillion nails in the wall...or whether it's just that I'm really out of shape, but it's got me beat. I took off the lower level myself, and then had a helper (Dean) assist me with the removal of the upper level of stucco/cladding.
- If you're demolishing a house, get a bin. Don't futz around with trailers, or whatever, just go for the full hog. It will be cheaper.
- The sheathing (which is interlocking, horizontal fir planks), is in great condition, but may need to be removed unfortunately (not sure if it has the required shear strength).
- Loading/unloading stuff on the street is going to be critical...not sure how to solve that problem.
- The little stained glass window is very cute and we'll aim to use it somewhere in the house (though I'll need to refinish it - see pic below).
- Our neighbours are all very lovely and have been not only thoughtful but patient (let's hope it continues!)
- Removal of the cladding was probably a good thing since one of the walls was completely rotted out (see below).

So - some pictures of the last little while.

Picture 1/2: Living room "pre demo" and now.

Living Room 1: Some wood panelling removed...some still there for your viewing pleasure...
Living Room 2: All the panelling gone, some of the lath and plast off
Living Room 3: All of the lath and plaster off...but vermiculite exposed (the dangers of leaving workers unattended)

Shot of the basement and some of my early reco-demo

The exposed little stained glass window (crazy that they buried it, eh?). Going to see if we can convince the city to alter plans to allow us to keep it (though it would bleed heat). If not, we'll re-use it inside somewhere.

Closer shot of the stained glass window.


Picture of my early handiwork at the back. Love that smurf blue house colour!

Our lovely tree protection.


Fortis came and cut the gas line, but made a mess of the front yard and sidewalk lawn area. 

Self-portrait of dirty demo man.

The start of the troubles with the vermiculite in the walls....

But even when there is pain, there are blue skies and flowers....

...which prepares you for more pain. Yeah - water damage - the wood you're seeing is the house's sheathing ...you can see clear through into the basement. Apparently the water spout was leaking.

Water damage up close. Water > Fir planks.


Removal of the stucco...and the cedar planks (or shakes up above).


And the dreaded drop ceiling con-non-containing-vermiculite